Last Updated on October 10, 2024 by Alice Benny
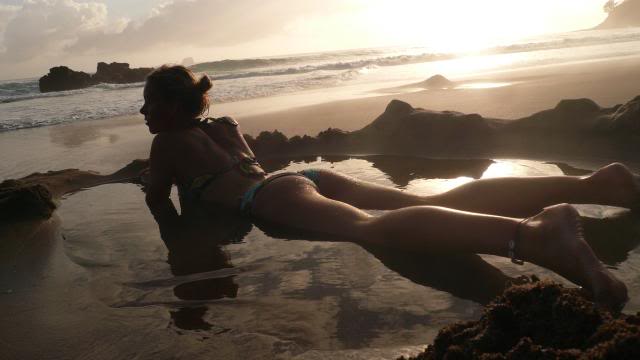
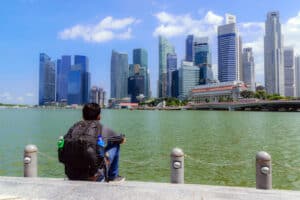
How to take a good picture of yourself while traveling? You’re on this amazing trip around the world – you take hundreds of pictures from all different angles, when you return you have pictures of amazing buildings, and places – but none of you!
The best way to avoid this from happening is simply to learn how to take a good picture of yourself while on the road!
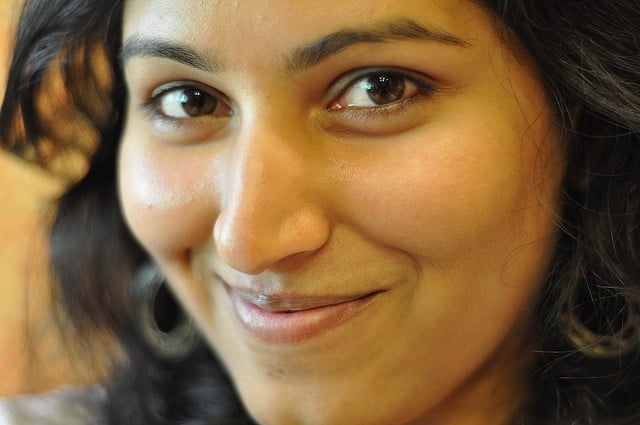
No excuses, you can learn this easily! Maybe you did get over your shyness and take a few pictures of yourself. But end up with the angles looking kinda weird with a face squashed in the corner. Or your whole face takes up the picture frame, blocking out the cool tourist attraction behind you.
How to Taa Good Picture of Yourself
All you seasoned travelers know the situation, and we have all done it! Those are two common results when taking pictures of yourself traveling around the world, but it doesn’t necessarily have to be that way.
Here is a guide to help you learn how to take a good picture of yourself and capture that special place at the same time.
And don’t forget to use these great self pictures to create a Create Your Own Custom Photo Book.
What better way than to remember your trip than a personally designed book full of pictures you took yourself?
3 ways for how to take a good picture of yourself
Do It Alone
Just DO IT! Just take one of yourself. Many people feel like dorks when doing this, but come on.
Nobody actually cares about what you do or how you do it – it’s all in your head.
Most people won’t even see, and the ones who do will either come up and ask you if you want them to take one of you or not even care.
Plus, I think most people have been in that situation themselves, it’s really nothing strange about taking pictures of yourself.
Hacks to take a good picture of yourself
Practice Makes Perfect
When you take a photo of yourself with one arm reaching out, you will have to strike a different “pose” than normal.
To make sure you get a good photo at the spot, make sure to learn how to take a good picture of yourself before you travel.
Practice at home, until you find the right angle for your face – that way you won’t have to take 20 pictures until you get one which is OK-looking.
The best way to avoid the stupid feeling of “vanity”, loneliness or whatever it is making you feel uncomfortable when taking pictures of yourself, is to get it over with quickly.
If you practice at home, get to know your best pose, you can get it done quickly by just taking one photo, and you’ll have an awesome picture within seconds.
Tips On What To Wear And How To Look
If you know your background will mostly be green, wear something red.
Compliment the colors in your background by wearing its opposite color (green / red, yellow/purple etc)
Use the setting “smooth skin colors” on your camera if possible.
It will make your face look smooth and even.
Take the photo slightly from above.
Not too high above, but slightly higher than eye level.
Take the photo on the side where your hair is parted on, that will usually look better.
Use The Camera Timer
If there is nobody around, or you feel like it’s safe to put the camera on timer and walk a few steps away from it, then the coast is clear.
Find a steady place where you feel like the camera is safe from falling, check the screen to see exactly where you’re aiming in the picture, set the timer on 10 seconds and RUN!
10 seconds is usually enough to get into the picture, strike your pose and smile.
Tip: If you don’t have a “real” tripod I strongly recommend you buy the Gorillapod.
Which is a flexible tripod which you can twist and turn the three legs in any direction so you can take a photo anywhere no matter the situation.
Another way to get a photo of yourself slightly further away than the arm can reach is to use a quickpod so you can still have the camera in your hands but at a further distance.

Ask Someone to take your picture
The best way to get a good picture of yourself is, obviously, not to take it yourself.
If you want to take this easy way out, and aren’t interested in learning how to take a good picture of yourself by yourself, then go for this one.
Choose someone who looks trustworthy to take a picture of you, for example a person who is already taking pictures of something, themselves or others.
Japanese tourists take a lot of pictures, so if you’re lucky enough to see a group of them – take the chance.
This is also a great way to meet new people – local or tourist, and start up a conversation – just be cautious of scammers.
Hope these tips helped you learn how to take a good picture of yourself while traveling.
If you have any other tips, just share them below!
How To Protect Your Camera From The Weather While Traveling
How Travel Blogging Can Help You Experience Destinations Differently
xShot Camera Extender Review Video
Check out our As We Travel video review
Travel Photography Tips
You Can Never Take Enough Pictures
The first travel photography tips is ~ It’s always disappointing to discover that what you thought was a perfect shot is blurry, over or under-exposed, or shows someone blinking.
For every great photo, there are plenty of not-so-great photos — improve your chances by taking multiple shots of everything.
Many DSLR cameras like the Nikon D7100 offer lighting fast shutter speeds. Use of the continuous shooting settings ensure that multiple shots are captured with a single click of the button.

- Nikon D7100
Localize
Monuments and museums make for memorable photos, but the customs, costumes, and daily activities of the locals are equally important in giving a country its unique character.

- travel photography tips
Of course, remember to always be polite and respectful.
If someone seems uncomfortable with your attention, don’t take the photo.
Geotag Photos
Geotagging photos clears up any confusion on where a photo was taken and will come in handy when uploading photos to a searchable database.
There are many methods of connecting your pictures with the associated location.
Some cameras and most smart phones have built-in GPS’s to automatically tag photos.
Alternatively, you can purchase an add-on GPS accessory.
Pay Attention to Signs
In addition to geo tagging, taking pictures of local signs and identifying marks will help you keep track of where photos were taken.

- hilarious signs
Plus, you won’t believe how many translated signs and place names are unintentionally hilarious.
These photos can a be a great conversation piece and excellent for sharing on social media.
Back to the Basics
A simple review of photography concepts such as lighting and exposure, and a review of your camera’s settings, can dramatically improve your photos.
To Zoom, or Not to Zoom?
Trick question: the answer is both!

- Beautiful closeup pictures
A mix of sweeping panoramas, close-ups, and macro shots keep an album interesting, and help to truly capture the essence of a place.
Bring Extra Storage Cards
Ditch the card that came with your camera for something bigger, and bring extra cards in case you run out of room or one gets damaged.

- More memory
Upload, Upload, and then Upload Again
Whenever you have Internet access, upload your photos.
This serves as a back-up in case your camera is damaged or lost, and also prevents the long upload times that result from letting photos pile up.
Another option is to purchase a storage card or camera with the ability to connect with Wi-Fi and automatically upload your pictures.
Many smart phones have this feature built in.
Have a Plan for Recharging
Even if you have rechargeable batteries, you won’t be able to recharge them unless you have the correct power adapter for whatever country you are traveling through.
So bring extra batteries, and if you will be off the grid, look into solar-powered or hand-crank chargers, which enable you to power up your devices from pretty much anywhere.
Carry a small pocket size camera with you at all times
If you select a larger camera for picture quality, you may also want to travel with a pocket size camera or high quality smart phone camera.
Imagine yourself reaching for your camera as you find the perfect shot.
Picasa vs Flickr Travel Bloggers Choice?
Picasa vs Flickr How do you decide where to store and share your photos?
There are literally hundreds of websites to choose between, and at a first glance they all look the same.
But the real battle is Picasa VS Flickr:
Picasa Web Albums and Flickr are the two dominating sites – also run by Yahoo! and Google respectively – used to upload and share photos online.
At a first glance they both seem pretty similar, but the truth is that there are some big differences between the two.
So let’s compare them… (side note – when we talk about Picasa, we are talking about the desktop software AND the web albums they offer online)
- Flickr
Uploading Limits
Which one is better depends on how you like to upload your photos.
Looking at the free accounts, Flickr only lets you upload 100 MB a month, and two videos, while there is no monthly limit on Picasa.
However, if you look at the yearly space limit, Flickr lets you upload 2 GB, while Picasa only lets you upload 1 GB.
So in the end, Flickr gives you more space, but Picasa lets you upload 1 GB in the same month if that’s what you want.
With the paid accounts there are also some differences.
Flickr only had one type of paid account, called “pro”, while with Picasa you can choose between 5 different accounts.
- Picasa VS Flickr
With the Flickr Pro account
You get unlimited uploads and storage, HD video playback, unlimited sets and collections and you won’t be bothered by annoying ads.
Picasa has more price options, but if you will be using it a lot it’s not really as good value as Flickr.
The cheapest deal is 5 dollars a year, which gives you 20 GB extra. For 20 dollars you get 80 GB of storage.
If you’re planning to store more then I recommend Flickr, since it’s cheaper.
- Picasa VS Flickr Travel Bloggers
Picture Editing
The great thing about Picasa is that you can edit your photos offline (via their download-able software) before you upload them on Picasa Web.
There are also so many cool editing tools to use.
Personally I use Photoshop to edit photos, but if I just want a nice quick touch to the photo I fix it in Picasa.
If you want to edit photos on Flickr you have to do it from another website called Picnik.
You can easily connect Picnik with your photos on Flickr (and Picasa as well if you like), and edit your photos from there.
It’s an easy program to handle and you get great results, but (and it’s a big but), you need to be online to do this, which isn’t always the easiest when traveling.
- Picasa VS Flickr Travel Bloggers Choice?
Community
At this, there isn’t much of a Picasa Vs Flickr going on, as Flickr dominates the web in this category.
It’s an amazing place to find great photography and the best place to show off your own.
There is a large community of people on Flickr, and they consist of all from professional photographers, to amateurs to families sharing their vacation photos.
Picasa hasn’t yet reached a point where people go to just browse photos and connect.
It’s a bit more private, which can be nice for those who are more interested in storing photos rather than showcasing them.
Some people feel intimidated when strangers mark their personal photos as their “favorites”, and prefer uploading them on Picasa instead.
And I understand them, it is a little creepy.
Extra Tools
Both Picasa and Flickr has great detail – you can put your photos on a map, and show exactly where the photo was taken.
Which is perfect for travel bloggers.
Picasa uses google maps, which is totally unbeatable. It has more exact locations to choose than Flickr.
Another pretty cool thing that Picasa does is to recognize faces.
It collects all faces and puts them into a face folder, each face in its own map.
It organizes pictures based on who is in them.
This way you can easily find good profile pictures, or find a picture of a person you’re looking for.
It’s sort of like an automatic tagging.
You can tag people in photos on Flickr as well, but it doesn’t do this automatically.
Sharing and Downloading Photos
Flickr is really the best choice when it comes to sharing photos.
It’s easy to manage and you can share it with more people.
The community is larger and if you want to showcase your photos they will more likely be seen here.
When it comes to downloading photos you can choose from several different sizes on Flickr, while on Picasa there is just one size.
Adding Tags, Notes and Privacy Settings
You create your slide shows, ad tags and notes in the offline software on Picasa, so it’s all done and ready when you upload the photos.
On Flickr however, it’s so easy to find the right buttons so it’s all done quite quickly.
What I love about Picasa is that you can prepare it all offline:
ad tags, notes, edit the photos, and then upload them once you have access to Internet.
The software also finds other old photos that might have gone lost in your computer and is hiding somewhere you can’t find it.
Flickr allows you to put privacy setting on individual photos rather than a whole set, while on Picasa you can only choose privacy settings on a whole album.
Whats best Picasa vs Flickr
So, which is wins the competition of Picasa vs Flickr?
It all really comes down to what you want, how you want it and what is more important for you.
We use both sites at different times of the editing and upload process, each one is very helpful for different purposes.
So to be honest, there is no ONE clear winner.
I encourage you to check them both out, and see which works best for you.
(Photo 1, 2, 3, 5, 6 : 1)


